Sandbox
On this page, you can earn points for interacting with the Ceramic Network. Let's walk you through the potential actions you can perform while you learn!
Read Query
Use the GraphiQL modules below to view existing data
Not Connected
Sandbox Mutation Query
Use the GraphiQL modules within the "Writing Data" section to create new data
Not Connected
Sandbox Extension Mutation Query
Clone the reposority found in the "Writing Data" section to create new data
Not Connected
Before we dive in, let's get you familiar with the GraphiQL interface. Start by pressing the pink play ▶️ icon in the component below:
You've performed your first query on a live ComposeDB node! Below are the data models the query provided for you is referencing:
type Posts
    @createModel(accountRelation: LIST, description: "A simple Post")
    @createIndex(fields: [{ path: "created" }])
    @createIndex(fields: [{ path: "edited" }])
    @createIndex(fields: [{ path: "tag" }]) {
    author: DID! @documentAccount
    body: String! @string(minLength: 1, maxLength: 100)
    tag: String! @string(minLength: 1, maxLength: 100)
    edited: DateTime
    created: DateTime!
    profileId: StreamID! @documentReference(model: "BasicProfile")
    profile: BasicProfile! @relationDocument(property: "profileId")
}
The query you performed essentially translates to "give me the first 10 indexed instances of Posts and show me the id, body, tag, created, and author id field values from that model."
Easy, right? Let's introduce another model into the mix:
type BasicProfile @createModel(accountRelation: SINGLE, description: "A basic Profile") {
 author: DID! @documentAccount
 name: String! @string(minLength: 3, maxLength: 100)
 username: String! @string(minLength: 5, maxLength: 255)
 description: String @string(minLength: 3, maxLength: 100)
 gender: String @string(minLength: 3, maxLength: 100)
 emoji: String @string(minLength: 1, maxLength: 2)
}
Here's a diagram to help you better visualize the relationships between a given user and instances of these two schemas:
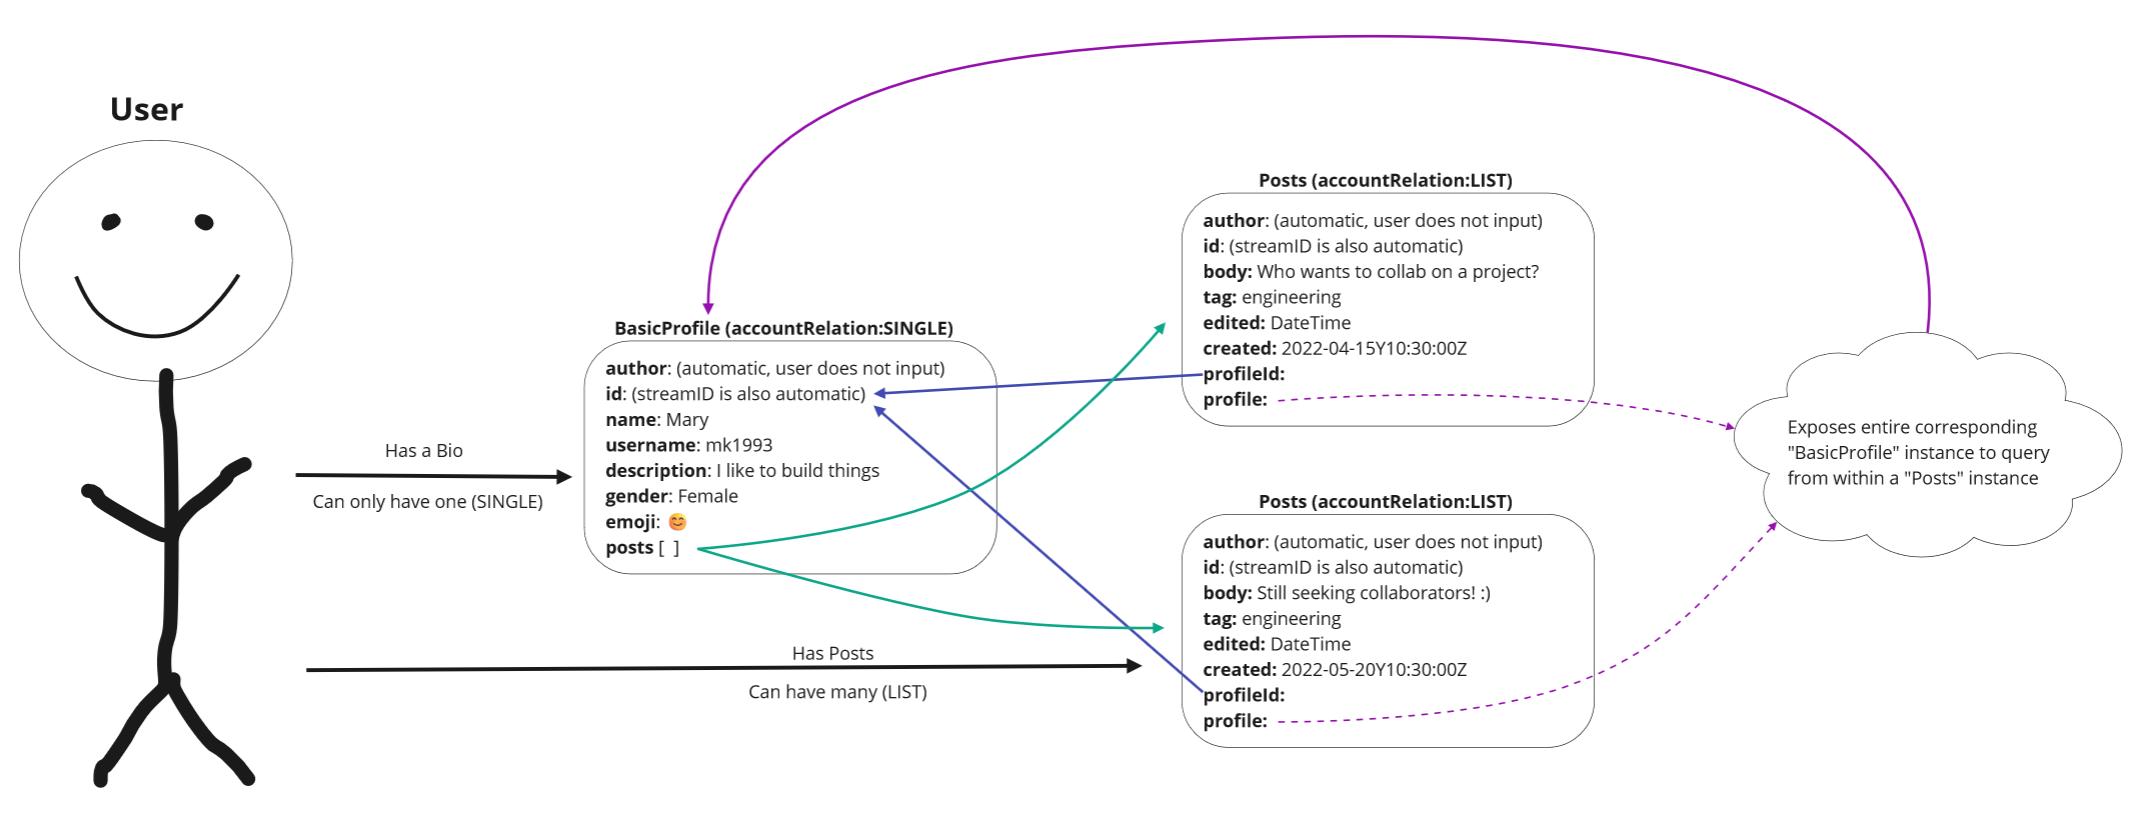
Continue into the next section to experiment with queries that utilize this BasicProfile model.
Reading Profiles
Use the example queries below to access data related to the BasicProfile model referenced above. Comments have been left for you above each query to help you understand what the query is requesting.
You may have noticed that the fourth tab labeled "WithComments" references a new model we havent discussed yet. Below is the model definition for your reference:
type Comments
    @createModel(accountRelation: LIST, description: "A comment on a post")
    @createIndex(fields: [{ path: "created" }])
    @createIndex(fields: [{ path: "edited" }]) {
    comment: String! @string(minLength: 1, maxLength: 100)
    edited: DateTime
    created: DateTime!
    profileId: StreamID! @documentReference(model: "BasicProfile")
    profile: BasicProfile! @relationDocument(property: "profileId")
    postId: StreamID! @documentReference(model: "Posts")
    post: Posts! @relationDocument(property: "postId")
}
We've also defined a field within our BasicProfile model that exposes the relationship between a BasicProfile instance and all Posts that they've created:
type BasicProfile @loadModel(id: "$PROFILE_ID") {
    posts: [Posts] @relationFrom(model: "Posts", property: "profileId")
}
This is why you're able to access the first 5 Posts created by each BasicProfile in the "WithPosts" tab.
Finally, we've defined a similar field within our Posts definition that allows you to access all Comments corresponding to that post:
type Posts @loadModel(id: "$POSTS_ID") {
    responses: [Comments] @relationFrom(model: "Comments", property: "postId")
}
You'll notice that the two sections below also leverage those features by calling on those relationships.
Reading Posts
Use the example queries below to access data related to the Posts model:
As mentioned in the previous section, several of the queries left for you ask for items in the responses field of Posts (which yields Comments corresponding to that Posts instance).
Reading Comments
Finally, use the example queries below to access data related to the Comments model:
Great work! You now know how to query based on multiple relationship types, perform filtering and ordering, and even combine filters. Hopefully you've also created a few custom queries of your own to test out.
Now that you're familiar with reading data, let's learn how to perform mutations.
Writing Data
Data Models
The following sandbox section will allow you to create Ceramic documents using a different type of query called mutations. For this section, you will be using a different model definition. These have been included for your reference below and have already been deployed onto the node this sandbox uses.
enum Proficiency {
  Beginner
  Intermediate
  Advanced
  Expert
}

type Language {
  JavaScript: Proficiency
  Python: Proficiency
  Rust: Proficiency
  Java: Proficiency
  Swift: Proficiency
  Go: Proficiency
  Cpp: Proficiency
  Scala: Proficiency
  WebAssembly: Proficiency
  Solidity: Proficiency
  Other: Proficiency
}

type CeramicDev
  @createModel(
    accountRelation: SET
    accountRelationFields: ["context"]
    description: "A Ceramic developer") {
  developer: DID! @documentAccount
  context: String! @string(maxLength: 100)
  languages: Language!
  attestations: [AttestToDev] @relationFrom(model: "AttestToDev", property: "attestedProfileId")
}

type AttestToDev @createModel(
    accountRelation: SET
    accountRelationFields: ["attestedProfileId"]
    description: "Signals if user attests to another developer profile") {
  attester: DID! @documentAccount
  attestedProfileId: StreamID! @documentReference(model: "CeramicDev")
  profile: CeramicDev! @relationDocument(property: "attestedProfileId")
  signal: Boolean!
}
You will use this model to self-describe your own development skills, and will therefore require you to alter the given examples to meet your actual abilities.
You'll notice several unique qualities within the definitions above:
Embedded "Language" Type
Unlike the definitions used above in the read section, CeramicDev makes use of an embedded type called Language, which allows developers the ability to use these definitions in their data modeling as if it were a scalar. It's important to note that embedded types also introduce some restrictions - for example, developers impose filtering and ordering based on embedded types.
Proficiency Enum
Our embedded Language type uses an enum called Proficiency that restricts the possible values each key within Language can be assigned to. In our use case, we implemented a simple paradigm that uses a scale of 4 proficiency "levels."
"SET" Account Relation
Most importantly, you'll see that SET is used to define the relation between the authoring account and the model instance document. Unlike LIST (which allows an infinite number of model instance documents to be associated with a given account), SET lets developers restrict the number of instance documents to 1 based on the value of a subfield.
A simple way to understand this is to think about reviews on an eCommerce platform. If a customer has purchased a product, the platform should ensure that the customer can only leave 1 review for the product they have purchased.
In CeramicDev,
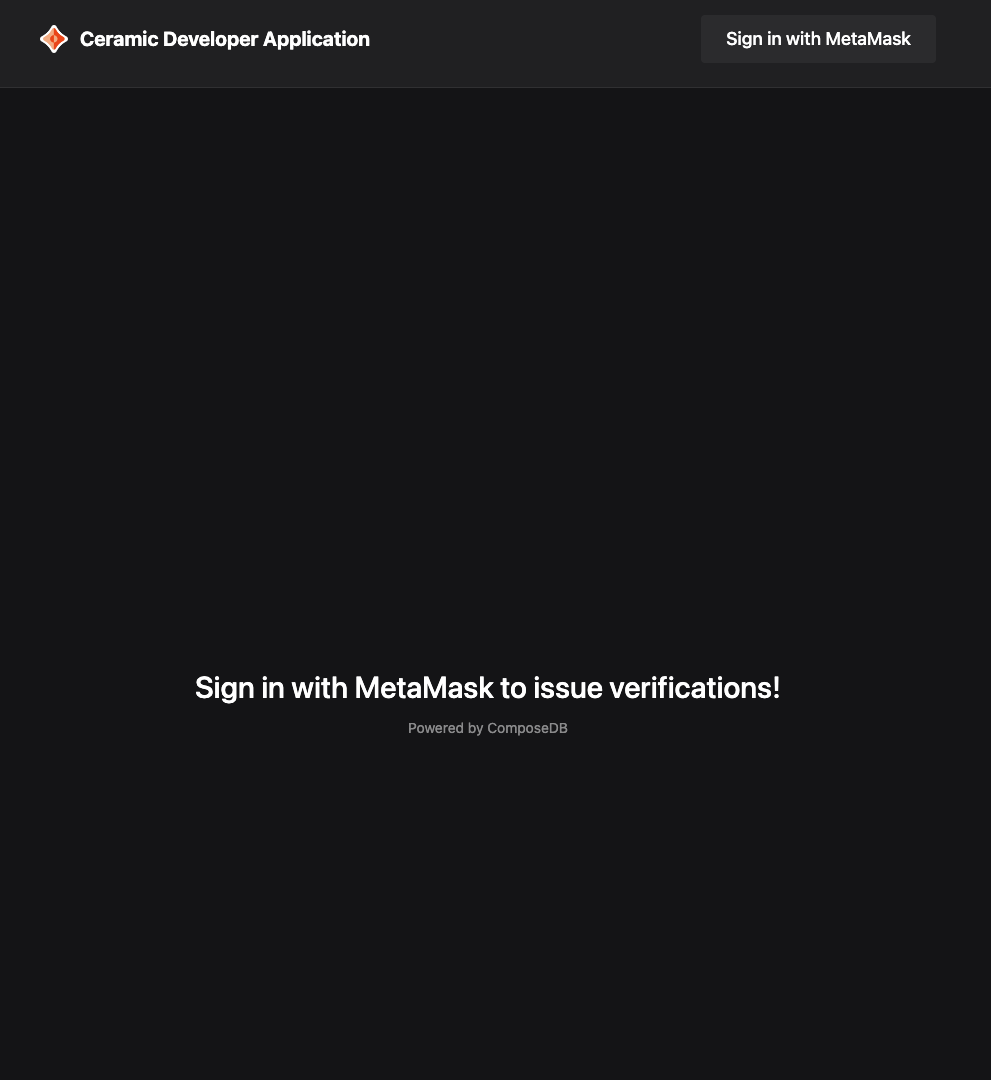
Authentication
You will first have to self-authenticate on the Ceramic node this sandbox environment uses. This is required for making mutation queries, whereas you do not have to be authenticated on a given node to read its data. In order to do so, you will need the MetaMask wallet browser extension installed.
Once you're ready, go ahead and press the Authenticate on Ceramic button below, and sign the messages within the MetaMask popups.
Your browser wallet should create a prompt for you that looks something like this:

Notice how there's 1 model listed under "Resources" in the prompt - the model listed here is the StreamID of the CeramicDev model definition shown above that has already been deployed onto Ceramic. By signing this prompt, you are creating a temporary session that allows the current application to create edits on your behalf only to the resources you've granted access to (in this case, our CeramicDev schema).
Creating a Record
Now that you're authenticated, you'll be able to create a CeramicDev profile of your own! Be sure to adjust the dummy queries below to meet your unique skill set. You can edit the languages variable and the corresponding proficiency fields for each language that represents your own expertise.
For example, if you notice that a language like Cpp is missing from your mutation and you want to signal that you have Intermediate experience, you can create a new line withing your languages object and add Cpp: Intermediate.
Developer Feed
Below you'll see the most recent 8 CeramicDev records in addition to all verifications that have been issued in relation to that CeramicDev profile (these have been filtered to ensure each verification is from a unique profile):
Write Data in a Local Environment
Notice how some of the profiles have obtained verifications? The ability to create an AttestToDev instance using this sandbox has been intentionally omitted from the runtime definition used on this page. We've done so to encourage developers to complete this sandbox module by following the steps below that allow you to verify your profile in a local environment.
To get started, clone the extension repository, install your dependencies, and run the local application:
git clone https://github.com/ceramicstudio/sandbox-extension
cd sandbox-extension
npm install
npm run dev
The operations above will run the extension application in developer mode - go ahead and navigate to http://localhost:3000 in your browser to start interacting with the application.
Once you have the extension running locally and visible in your browser, you'll be able to sign in using MetaMask. Be sure to use the same address and network you used when authenticating yourself on this page.
Click the Sign in with MetaMask button in the upper right-hand corner as the screenshot shows below to get started.
Once authenticated, you'll be able to verify your own profile as well as others. If you've signed in using the same account and network as the one you used on the sandbox page, you should see the profile you just created appended to the right:
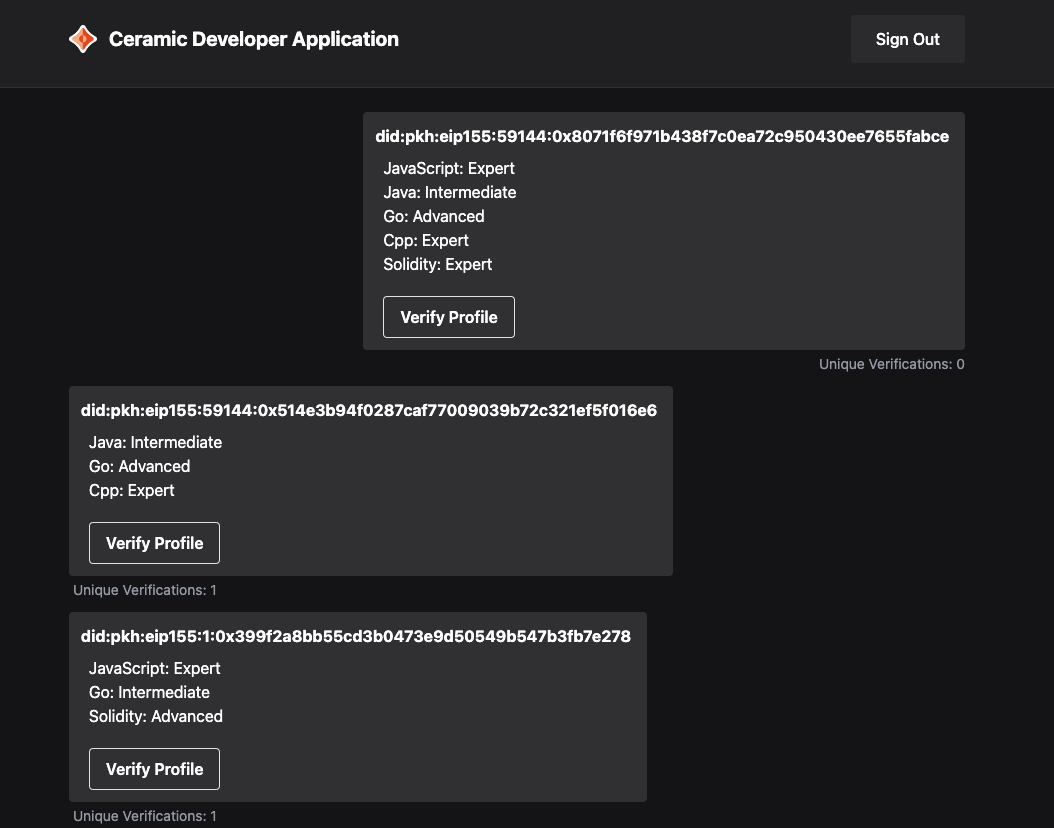
Notice how your profile does not currently have any unique verifications. You can go ahead and verify by clicking the Verify Profile button for that item. You should now see something like this:
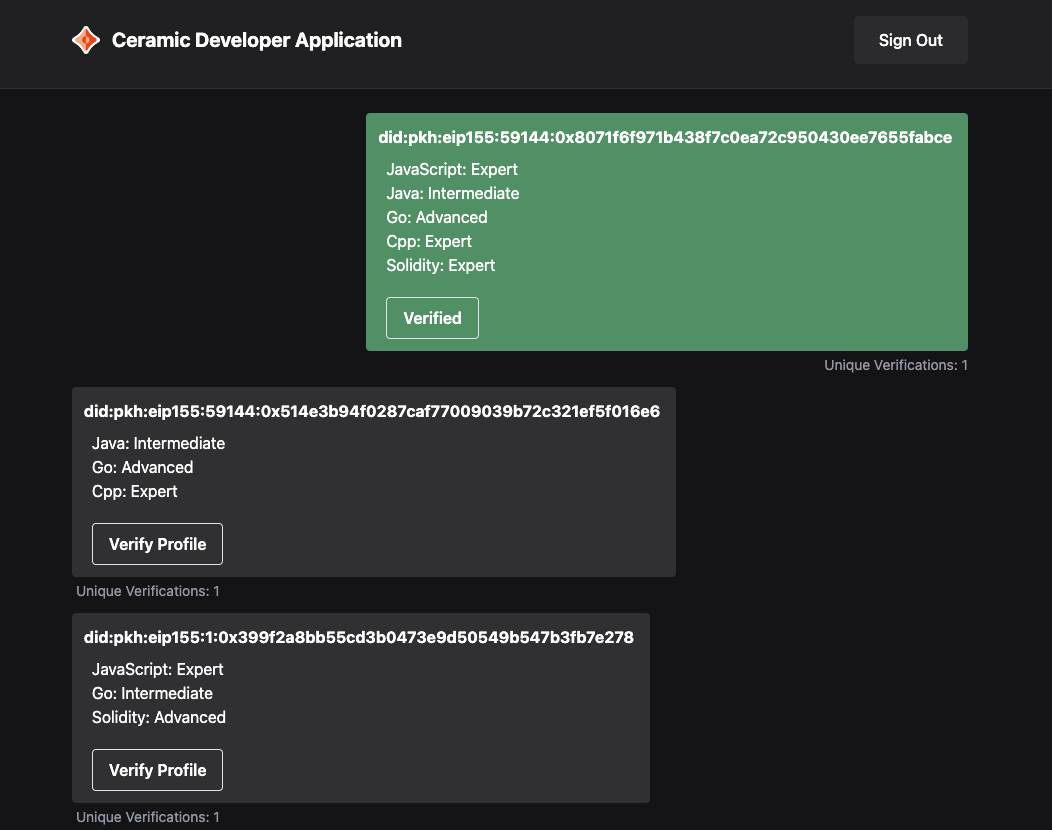
You can also verify profiles made by other developers that are appended to the left of your screen.
Finally, once you've verified your profile, return back to this page. You should now see your verification(s) counted for each unique verification you issued in your local environment back in the Developer Feed
You've done it! You now know how to perform successful read and write queries on a live ComposeDB node!
Next Steps
To begin building with ComposeDB in your local environment using the same data models you just queried, get started with setting up your environment.